For some time now the ConfigMgr PowerShell module has been extended to include more cmdlets that allows us to customize and even create or amend a task sequence in any way you want, more or less. Previously, before the addition of the new cmdlets for task sequence management, we could basically not accomplish anything in terms of setting up automation for task sequences. Up until now, we’ve had to rely on using various methods to customize a task sequence, for instance to replace an operating system image package with the latest version. A little more than over one year ago, I blogged about how to modify a particular step in a task sequence using a method that involved calls to the SMS Provider by utilizing various methods for certain classes and it also included some XML. If you want to have a look at what I wrote back then, check this out:
Modify Task Sequence steps in ConfigMgr with PowerShell
Today, we can simplify this process a lot. Starting with ConfigMgr 1710 and onward we have access to a lot of cmdlets that will assist us in automating different aspects around our operating system deployment process, especially the task sequences. Run the following command to explore some of the available cmdlets:
Get-Command -Name *CMTSStep*, *CMTask* -Module ConfigurationManager
From the output of the above command, you’ll see that Microsoft has done a tremendous work of giving us the tools we require for almost any automation task we can think of regarding operating system deployment and task sequences. In this blog post, we’ll go over a couple of common automation tasks that are made possible by using these new cmdlets.
Create a Task Sequence from scratch
We’ll begin with how to create a new task sequence for deploying an operating system image using the default layout that Microsoft provides. Creating a task sequence this way has been possible for some time, but I’ve chosen to include it here because it will act as a building block for the additional customization demonstrations in this post.
First of all we need to retrieve the operating system image and boot image objects that we want to utilize in the task sequence. In addition we need to convert a password to a SecureString that can be used for the domain join account.
# Get Operating System Image object
$OperatingSystemImage = Get-CMOperatingSystemImage -Name "Windows 10 Enterprise 1709 x64"

# Get Boot Image object
$BootImage = Get-CMBootImage | Where-Object { $_.Name -like "Boot Image (x64)" }

# Secure domain join account password from plain text
$SecurePassword = ConvertTo-SecureString -String "P@ssw0rd" -AsPlainText -Force
With this information, we continue to create the actually task sequence. All parameter input values have been put together in a splatting hash-table for a more pleasant viewing experience.
# Create a new Task Sequence
$TaskSequenceArgs = @{
    InstallOperatingSystemImage = $true
    Name = "Windows 10 Enterprise 1709 x64"
    BootImagePackageId = $BootImage.PackageID
    OperatingSystemImagePackageId = $OperatingSystemImage.PackageID
    OperatingSystemImageIndex = 1
    JoinDomain = "DomainType"
    DomainName = "domain.local"
    DomainAccount = "DOMAIN\domainjoin"
    DomainPassword = $SecurePassword
    TimeZone = [System.TimeZoneInfo]::FindSystemTimeZoneById("W. Europe Standard Time")
    PartitionAndFormatTarget = $true
    SoftwareUpdateStyle = "All"
}
New-CMTaskSequence @TaskSequenceArgs
Next up we retrieve the newly created task sequence object by using the following code:
# Get Task Sequence object
$TaskSequence = Get-CMTaskSequence -Name "Windows 10 Enterprise 1709 x64"
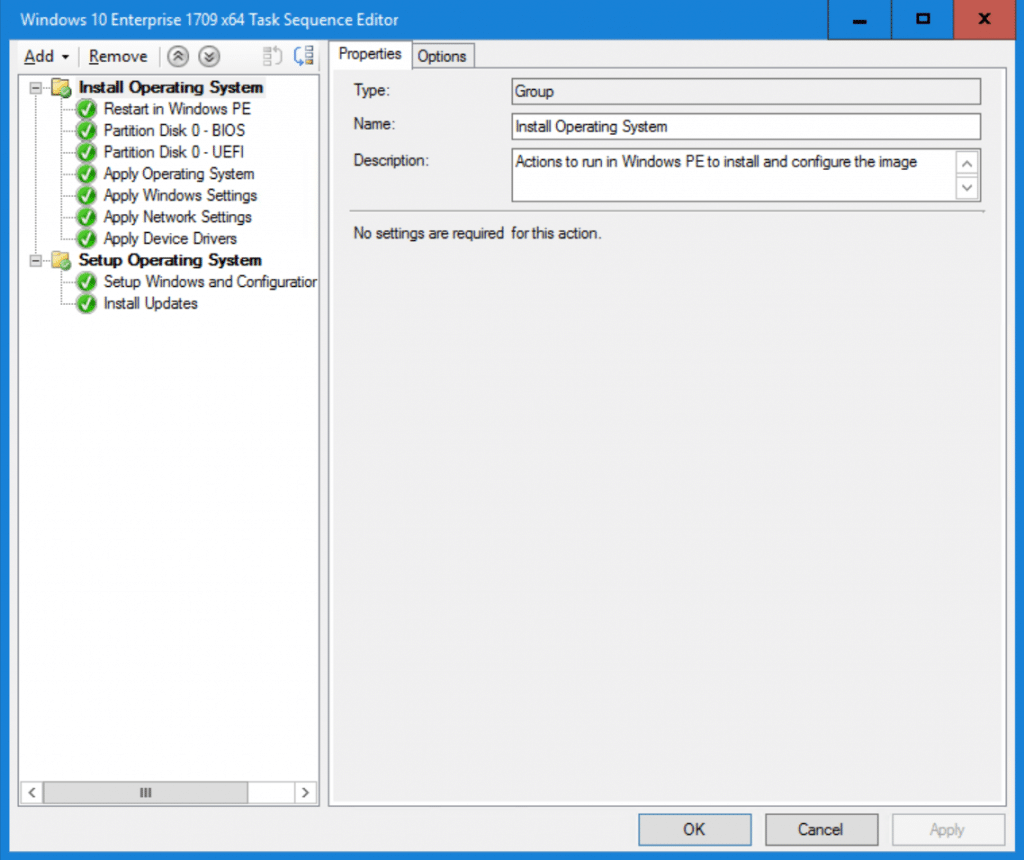
And that’s it, we have created a new task sequence and made some basic modifications to it. This is what it currently looks like:

Add Group steps and Apply Driver Package steps
We all know that using the default Apply Device Drivers step using Plug-and-Play is not the most optimal way of dealing with drivers, so we can simply just remove that step all together. Using the Remove-CMTaskSequenceStepAutoApplyDriver cmdlet, we can remove the step named Apply Device Drivers from the task sequence object assigned to $TaskSequence. See the code below:
# Remove Apply Device Drivers step
Remove-CMTaskSequenceStepAutoApplyDriver -InputObject $TaskSequence -StepName "Apply Device Drivers" -Force
Let’s use a more common approach referred to as total control for dealing with drivers. First we need to add a Group step called Apply Driver Package and then add an Apply Driver Package step directly under this group. The code below demonstrates how to create the Group step and add it directly after the Apply Network Settings step. Using the New-CMTaskSequenceGroup cmdlet creates a Group step object that we need to reference later.
# Add a group step called Apply Driver Package after Apply Network Settings
$NewGroup = New-CMTaskSequenceGroup -Name "Apply Driver Package"
Set-CMTaskSequenceGroup -InputObject $TaskSequence -AddStep $NewGroup -InsertStepStartIndex 6 -StepName "Install Operating System"
We use the Set-CMTaskSequenceGroup cmdlet and specify the $TaskSequence object as the input object to be amended and the $NewGroup object we just created for the AddStep parameter. Since we want the Group step to be added directly after the Apply Network Settings step, we simply just need to figure out the index position for that position, which in this case would be 6 that we can specify for the InsertStepStartIndex parameter. It’s also important to specify under what Group step the new Group step will be added, hence the Install Operating System value for the StepName parameter.
With the Group step added, let’s take a look at how we can add the Apply Driver Package step into this group:
# Add a new Apply Driver Package step
$DriverPackage = Get-CMDriverPackage -Name "Dell Precision 5520 - Windows 10 x64"
$NewDriverPackageStep = New-CMTaskSequenceStepApplyDriverPackage -PackageId $DriverPackage.PackageID -Name "Dell Precision 5520"
Set-CMTaskSequenceGroup -TaskSequenceId $TaskSequence.PackageID -StepName "Apply Driver Package" -AddStep $NewDriverPackageStep -InsertStepStartIndex 0
Here we simply retrieve the driver package object we want to be added to a new Apply Driver Package step and assigns it to a variable named $DriverPackage. We then utilize the New-CMTaskSequenceStepApplyDriverPackage cmdlet together with the previous collected driver package object. Finally we use the Set-CMTaskSequenceGroup cmdlet to add the new Apply Driver Package step to our desired task sequence with the InsertStepStartIndex at 0.
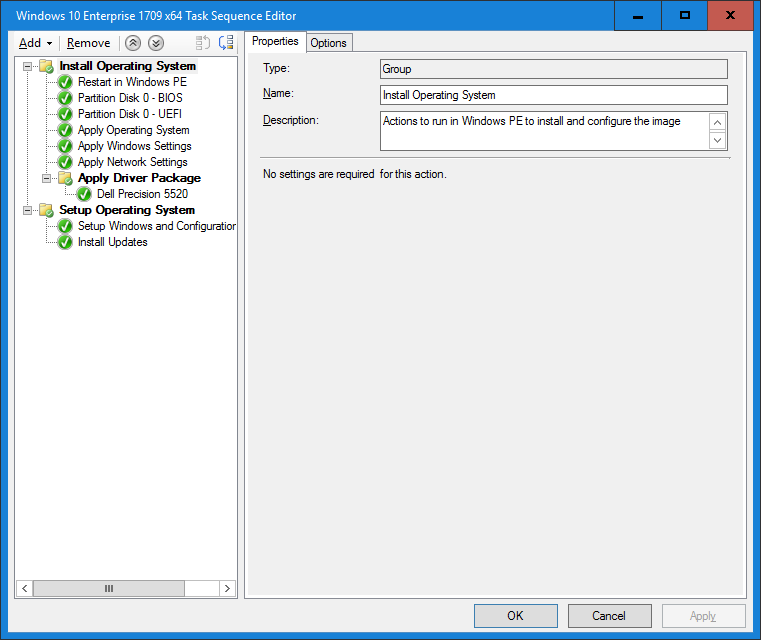
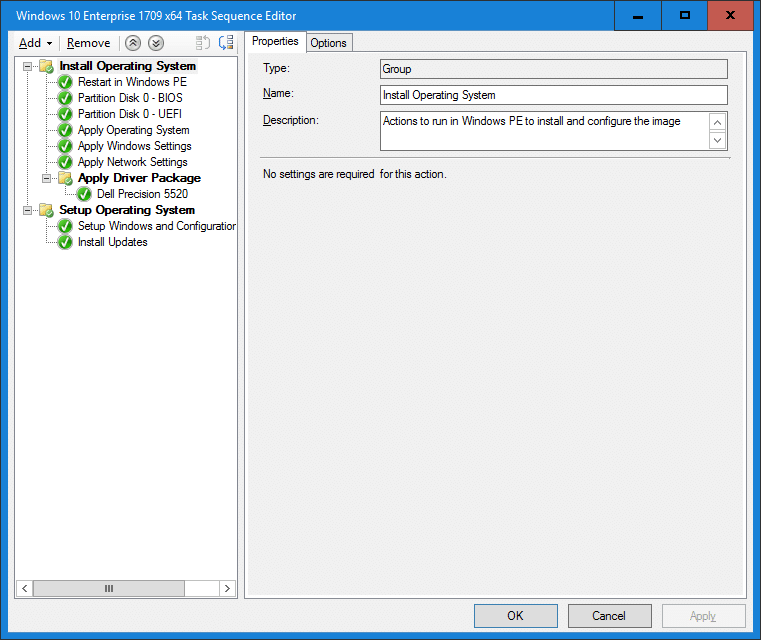
Our task sequence should now look similar to this:

Create a condition for the Apply Driver Package step
Normally when adding driver packages like this, it’s a best practice to also add a condition in terms of a WMI query that makes sure that the specific driver package step is only executed for the supported computer model. To accomplish this with PowerShell, there’s a cmdlet called New-CMTSStepConditionQuery that could be used. Use this cmdlet like shown below in the example and assign the condition object to a variable named $WMIQueryCondition. Use the Set-CMTaskSequenceStepApplyDriverPackage cmdlet to modify the Dell Precision 5520 step in the task sequence object assign in the $TaskSequence variable. Adding the new condition object is done by specifying that as the value for the AddCondition parameter.
# Create condition for Apply Driver Package step
$WMIQueryCondition = New-CMTSStepConditionQueryWmi -Namespace "root\cimv2" -Query "SELECT * FROM Win32_ComputerSystem WHERE Model like '*Precision 5520*'"
Set-CMTaskSequenceStepApplyDriverPackage -InputObject $TaskSequence -StepName "Dell Precision 5520" -AddCondition $WMIQueryCondition
Replace Apply Driver Package package
Up until now I’ve shown you how to build a task sequence and add steps anywhere you like. Hopefully you have a process of maintaining driver packages and updating to the latest version available. Being able to automatically update a task sequence step for a particular Apply Driver Package step with the new driver package could simplify the whole process even further. This can be accomplished by using the Get-CMDriverPackage cmdlet to retrieve the driver package object you want to replace an older object being used in a task sequence. Assign that object to a variable and use it together with the Set-CMTSStepApplyDriverPackage cmdlet. Determine the Apply Driver Package step by using the StepName parameter of the CMTSStepApplyDriverPackage cmdlet and use the PackageID property from the driver package object for the PackageId parameter.
# Replace a package object for Apply Driver Package step
$NewDriverPackage = Get-CMDriverPackage -Name "Dell Precision 5520 - Windows 10 x64" | Where-Object { $_.Version -like "A04" }
Set-CMTSStepApplyDriverPackage -InputObject $TaskSequence -StepName "Dell Precision 5520" -PackageId $NewDriverPackage.PackageID
Replace Operating System Image package
Another common task that’s now possible to automate with the new cmdlets is to replace an Operating System Image package used in a task sequence. Simply retrieve the new operating system image package that should replace the existing package in use for the task sequence by using the Get-CMOperatingSystemImage cmdlet and assign it to a variable named $OperatingSystemImage. Use the Set-CMTSStepApplyOperatingSystem cmdlet and specify the operating system image package object for the ImagePackage parameter. You can even specify the image index if required by using the ImagePackageIndex parameter.
# Update Apply Operating System step with new image package object
$OperatingSystemImage = Get-CMOperatingSystemImage -Name "Windows 10 Enterprise 1703 x64" | Where-Object { $_.Version -like "2017-12-04" }
Set-CMTSStepApplyOperatingSystem -TaskSequenceId $TaskSequence.PackageID -ImagePackage $OperatingSystemImage -ImagePackageIndex 1
Moving steps up or down
The last thing I want to demonstrate in this blog post is how to move a step in a task sequence up or down any number of steps within its Group step. This can easily be accomplished with the available Set-CMTSStep* cmdlets (use Get-Command -Name Set-CMTSStep* for a list of available cmdlets). As a first example we could move the Apply Operating System step up one step by using the following example code:
Set-CMTSStepApplyOperatingSystem -InputObject $TaskSequence -StepName "Apply Operating System" -StepOrder MoveUp
If we’d want to move it down instead, we would use the following code:
Set-CMTSStepApplyOperatingSystem -InputObject $TaskSequence -StepName "Apply Operating System" -StepOrder MoveDown
However, if we know the index position with the Group step the step we want to move resides, we could easily just use the following code and specify the MoveToIndex parameter:
Set-CMTSStepApplyOperatingSystem -InputObject $TaskSequence -StepName "Apply Operating System" -StepOrder MoveToIndex -MoveToIndex 1
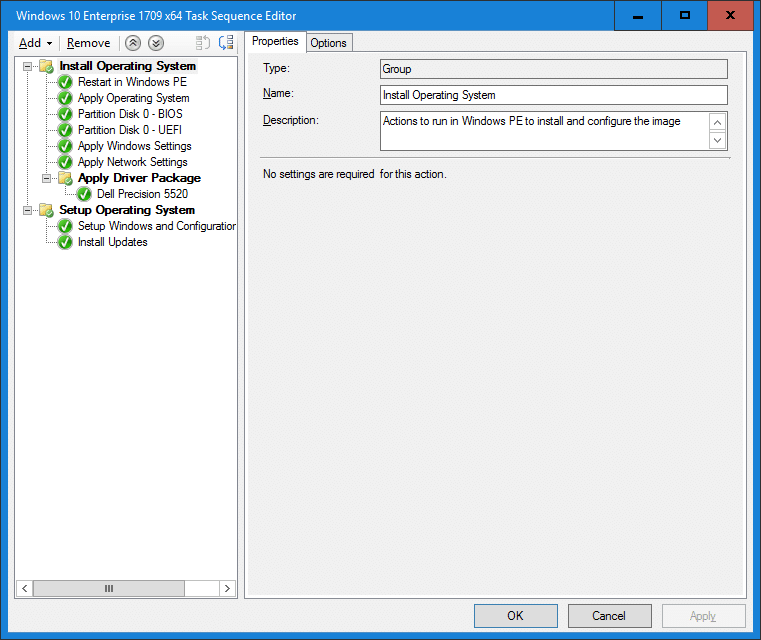
The image below shows the last command above executed and where the Apply Operating System step has been moved to the second position within the Group step. Remember, index position functions as an array and always starts with 0, being the first position.

I hope that you’ve learned a couple of new things in how to automate and customize your task sequences, or at least got some new ideas, by using the ConfigMgr PowerShell module.
The post Customize Task Sequences in ConfigMgr Current Branch using PowerShell appeared first on MSEndpointMgr.